Wednesday, April 16, 2014
What Instrument Is Used to Test the Condition of a Spark Plug
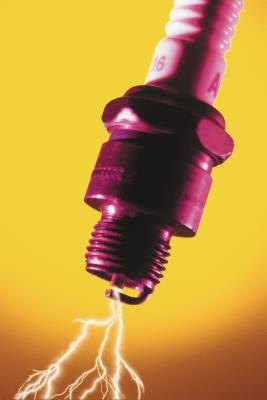
While the computerized engine management systems that run todays cars are extremely complex and require increasing specialized diagnostic equipment and tools, all gasoline-burning engines must still have spark plugs. The plugs allow a properly timed spark of electricity to jump through the flammable mixture introduced into the top of the piston chamber, causing ignition. Ascertaining their condition is done more through familiarity and interpretive knowledge than through the use of a single piece of equipment.
Know Your Plugs
The terms cold plug and hot plug are often used, and a knowledge of what to expect from the plug is necessary in determining its condition. The terms er to the ability of the material that the plug is made from to transfer heat, in this instance from the point at which the spark occurs into the engine block for dissipation. A cold plug transfers heat quickly and does not work well at extremely high temperatures. A hot plug transfers heat poorly, allowing heat to build up to approximately 1,550 degrees Fahrenheit, and is designed to work in that way; hot plugs are less susceptible to fouling because they burn off contamination. Identification is a question of experience: In general, hot plugs have longer insulator tips.
Visual Condition
Always allow an engine to fully cool before attempting any service work, including the removal of spark plugs. If the insulator tip of a plug that has been in service looks pale gray, or pale gray with a yellow or brown tint, the engine is running correctly, the spark plug gap is set correctly and the plug is torqued correctly into the receiver. Dull, black carbonization on the tip suggests that too-cold plugs are in use, and they should be replaced with hotter-running units. As with all visual indications, this symptom could also indicate problems elsewhere in the engine, in this instance a bad fuel mixture. Melting at the electrode indicates either that the plug was incorrectly torqued into position or that the heat range of the plug is not as suggested for the engine.
Gapping
The space between the electrode and the insulator tip must be exact for the plug to function correctly. Spark plug gap-testing tools are a set of wafer-thin blades -- each blade looks something like a fingernail cleaner -- that rotate on a pivot in and out of a case. These tools used to be ubiquitous in every do-it-yourselfers and professionals kit, but modern engines and plug technology have made them all but redundant. New plugs are now delivered with the gap precisely set and do not deform under any but the most extreme of engine conditions. If a modern spark plug gap changes under use, that is a symptom, not a cause; the cause must be determined by engine diagnostics and the plug set replaced after rectification of the fault.
Equipment
An array of equipment is available to test spark plug condition, but the visual checks suggested and a regular maintenance schedule make the investment practically unnecessary, even for the professional. The spark plug gapping tool is, as noted, all but redundant in modern vehicle maintenance practices. Working according to the manufacturers instructions, it is possible to use a volt-ohmmeter to ascertain the circuit load.
Voltage Testing
Metered spark gap testers are available that plug into the coil to measure the jump of the spark. Capable of handling current between 0 and 40,000 volts, the tool diagnoses faults in the coil, the ignition wires and the plugs.
Testing Spark Plug Wires
Inline spark testers that use a bulb do not give a metered reading, but they do give an instant indication of whether a coil-wire-plug circuit is operational. The device is inserted between the plug and the wire, after you have first removed the wire from the top of the plug. When the engine is turned over a bulb flashes if the circuit is functional but does not flash if it is faulty. Compact ignition testers are extremely simple to use to verify that there is a spark to the plug. Fitted into a plug wire end and clamped to the engine, they should spark when the engine is turned over. If they do not, there is a problem upstream of the device.

Monday, November 11, 2013
How to Replace the Spark Plugs on a 2001 Ford Expedition

Replace the spark plugs in your 2001 Ford Expedition at home, and save time and money. To keep your Expedition in top running condition, you need to perform regular maintenance. One of the most important things to replace in your vehicle is the spark plugs. If your spark plugs are burned out or damaged, your engine will run roughly and get poor gas mileage.
Instructions
- 1
Pop the hood, and find the ignition coils under the intake manifolds, located near the top of the engine. Remove the coils with the socket wrench set. Note where each coil came from, as you will need to put them back in place later. Under the coils, you will find the spark plugs.
2Remove the spark plugs with a wrench. If they are slightly difficult to remove, spray them with WD-40 to loosen them.
3Look up the gap size in the Owners Manual. Set the gap, using the spark plug gapper. Install the new spark plugs into the engine block with the spark plug wrench. Dont turn them too tightly.
4Put the ignition coils back in place, and secure them. Lower the hood of the vehicle.
Tuesday, October 29, 2013
How to Clean Aircraft Spark Plugs

Aircraft are, by nature, far more maintenance-dependent than automobiles. Whereas an automobile breakdown might prove inconvenient or costly, when a pilots ride breaks down the closest tow truck is likely to be several thousand feet below. Cleaning an aircrafts spark plugs isnt really any different than cleaning any other gas engines spark plugs, and should be part of any regularly-scheduled service interval.
Instructions
- 1
Remove the spark plugs from your engine. This procedure will vary greatly by engine and airframe, but most are designed with regular plug maintenance in mind. Removing plugs from an aircraft engine is very similar to removing them from a car engine; the primary difference is that many aircraft use thread-on plug wires instead of automotive-style plug-ins. To remove threaded plug wires, simply unscrew them from the plug ends.
2Drop the spark plugs -- electrode-end down -- into your mason jars. Lower them carefully so as not to damage the slugs. You may need two or more jars to hold the plugs. Pour your naptha solvent onto the jars to a depth of about one inch, or enough to cover the plug threads. Try to avoid pouring the solvent over the tops of the plugs. Allow them to sit in the solvent for 30 minutes.
3Remove the plugs from the solvent. You can allow them to air dry, but you can dry them in seconds using the air supply from your sandblasting setup. At this point, the carbon on the plugs should be soft enough to remove with the baking soda blasting media.
4Fill your sandblaster hopper with baking soda and trigger the sandblaster to purge any residual sand from the system. Turn the sandblasting pressure up to between 150 and 200 psi.
5Hold your plug tip about three to five inches from the electrode and spray it down with baking soda. Rotate the plug to clean all around the electrode tip and the ground strap. You can remove stubborn carbon deposits by lightly scraping them with the end of your gun or a copper wire brush. Continue blasting the plug until its free of all discoloration and carbon. Repeat with your remaining plugs.
6Fill your soup pot with water and place it on an electric stove to boil. Drop the plugs one at a time into the water to dissolve the baking soda. This is where the whole process comes together. Mechanics have been sandblasting spark plugs for years, but the sand tends to get trapped inside the plug and lead to later fouling. Baking soda dissolves in water, but it isnt aggressive enough to remove really hard carbon deposits without prior softening with a solvent like naptha.
7Dry the plugs with compressed air and reinstall them into the engine in the reverse order of removal.